Make backups simple using restic, a utility that automatically reads, compress and writes your backup to a local or remote storage option.
In this how-to, we will set up restic to backup a local directory to another directory, and to a remote S3 server (Cloudflare R2).
Setting it up
First step is to install restic. If your package manager is supported, follow the instruction on the restic install page. Otherwise you can download the release from GitHub and decompress it to your path.
# Download restic latest version as of writing from GitHub
$ wget https://github.com/restic/restic/releases/download/v0.13.1/restic_0.13.1_linux_amd64.bz2

# Uncompress it
$ bzip2 -d restic_0.13.1_linux_amd64.bz2

# Install it
$ install -m 0755 restic_0.13.1_linux_amd64 /usr/local/bin/restic

# Verify it is installed correctly
$ restic version
restic 0.13.1 compiled with go1.18 on linux/amd64
This assumes you have the permission to write to /usr/local/bin Now that it is installed, let’s have a look at doing our first backups. First thing, let’s backup to another part of our filesystem (It can be anything! A mounted NFS or external disk will work).
Restic work by thinking of backup locations as repositories. In a repository you will write multiple backups and restic will handle the magic for you (diff, snapshots, encryption, etc…)
Let’s create our first repository using restic init .
$ restic init -r /tmp/
enter password for new repository:
enter password again:
created restic repository 703b18a10d at /tmp/

Please note that knowledge of your password is required to access
the repository. Losing your password means that your data is
irrecoverably lost.
Using /tmp as the target for the example, it should be where you want to store your backups
Do not loose your password! Losing it means losing the data. All restic backup are encrypted.
Backing up data
Now let’s do our first backup, using restic backup .
$ tree example_folder/
example_folder/
├── collaboration
│   └── customer_list.txt
└── work.txt

1 directory, 2 files

$ restic backup -r /tmp example_folder/
enter password for repository:
repository 703b18a1 opened successfully, password is correct
created new cache in /home/kexo/.cache/restic
no parent snapshot found, will read all files

Files:           2 new,     0 changed,     0 unmodified
Dirs:            2 new,     0 changed,     0 unmodified
Added to the repo: 1.544 KiB

processed 2 files, 51 B in 0:00
snapshot 9bc7acfd saved
Restic created a snapshot. This snapshot is how the data looks like for this backup.
Let’s assume we work on one file and we want to back it up again.
$ echo "new_customer" >> example_folder/collaboration/customer_list.txt
$ restic backup -r /tmp example_folder/
enter password for repository:
repository 703b18a1 opened successfully, password is correct
using parent snapshot 9bc7acfd

Files:           0 new,     1 changed,     1 unmodified
Dirs:            0 new,     2 changed,     0 unmodified
Added to the repo: 1.529 KiB

processed 2 files, 64 B in 0:00
snapshot e6cd3e7e saved
Restic created a new “snapshot” with our changes added. We can list the snapshot in the repo with the restic snapshots command.
$ restic snapshots -r /tmp/
enter password for repository:
repository 703b18a1 opened successfully, password is correct
ID        Time                 Host        Tags        Paths
--------------------------------------------------------------------------------
9bc7acfd  2022-07-25 16:23:20  host1               /home/kexo/example_folder
e6cd3e7e  2022-07-25 16:34:38  host1               /home/kexo/example_folder
--------------------------------------------------------------------------------
2 snapshots
What’s nice about restic is that it’s able to do de-duplication and stores diff of the data, not everything every time. You can compare snapshot diff with restic diff
$ restic diff -r /tmp 9bc7acfd e6cd3e7e
enter password for repository:
repository 703b18a1 opened successfully, password is correct
comparing snapshot 9bc7acfd to e6cd3e7e:

M    /example_folder/collaboration/customer_list.txt

Files:           0 new,     0 removed,     1 changed
Dirs:            0 new,     0 removed
Others:          0 new,     0 removed
Data Blobs:      1 new,     1 removed
Tree Blobs:      3 new,     3 removed
  Added:   1.529 KiB
  Removed: 1.520 KiB
You can clearly see any change between the two snapshots For more details abour the internal, check their awesome docs.
Restoring data
A working backup is a backup you can restore from - Me, during a painful data recovery.
Ho no! I suddenly erased data from my directory!
$ rm -r example_folder/collaboration/
To restore from a backup with restic, you need to select the snapshot you want to restore from, and to where you should restore it.
$ restic -r /tmp restore e6cd3e7e --target ~/
enter password for repository:
repository 703b18a1 opened successfully, password is correct
restoring <Snapshot e6cd3e7e of [/home/example/example_folder] at 2022-07-25 16:34:38.945127653 +0200 CEST by example@host1> to /home/example/

$ tree example_folder/
example_folder/
├── collaboration
│   └── customer_list.txt
└── work.txt
And there it is, we got our data back.
Remote repo
The nice part about restic, is that it works natively with S3 compatible storage. This way we can use the same interface as we did before, but we backup to the cloud and encrypted!
In this example we will backup to Cloudflare R2, but you can do it with any remote S3 (Aws, GCP, etc…).
- Create a Cloudflare R2 bucket
- Create a Cloudflare R2 API Token
- Generate a random password for your bucket

We’re going to put these values in the environment to simplify the restic commands.
# Restic repository location & password
$ export RESTIC_REPOSITORY=s3:https://<cloudflare_account_id>.r2.cloudflarestorage.com/<r2_bucket_name>
$ export RESTIC_PASSWORD=supersecretpassword

# S3 provider API Key ID & Secret
$ export AWS_ACCESS_KEY_ID=<your token access key id>
$ export AWS_SECRET_ACCESS_KEY=<your token access key secret>
Now, let’s create a remote restic repo in this R2 bucket.
$ restic init
created restic repository 80d579eee7 at s3:https://<cloudflare_account_id>.r2.cloudflarestorage.com/restic-example-backup

Please note that knowledge of your password is required to access
the repository. Losing your password means that your data is
irrecoverably lost.
Now let’s do a backup there
$ restic backup example_folder/
repository 80d579ee opened successfully, password is correct
created new cache in /home/kexo/.cache/restic
no parent snapshot found, will read all files
Files: 2 new, 0 changed, 0 unmodified
Dirs: 2 new, 0 changed, 0 unmodified
Added to the repo: 1.551 KiB
processed 2 files, 64 B in 0:01
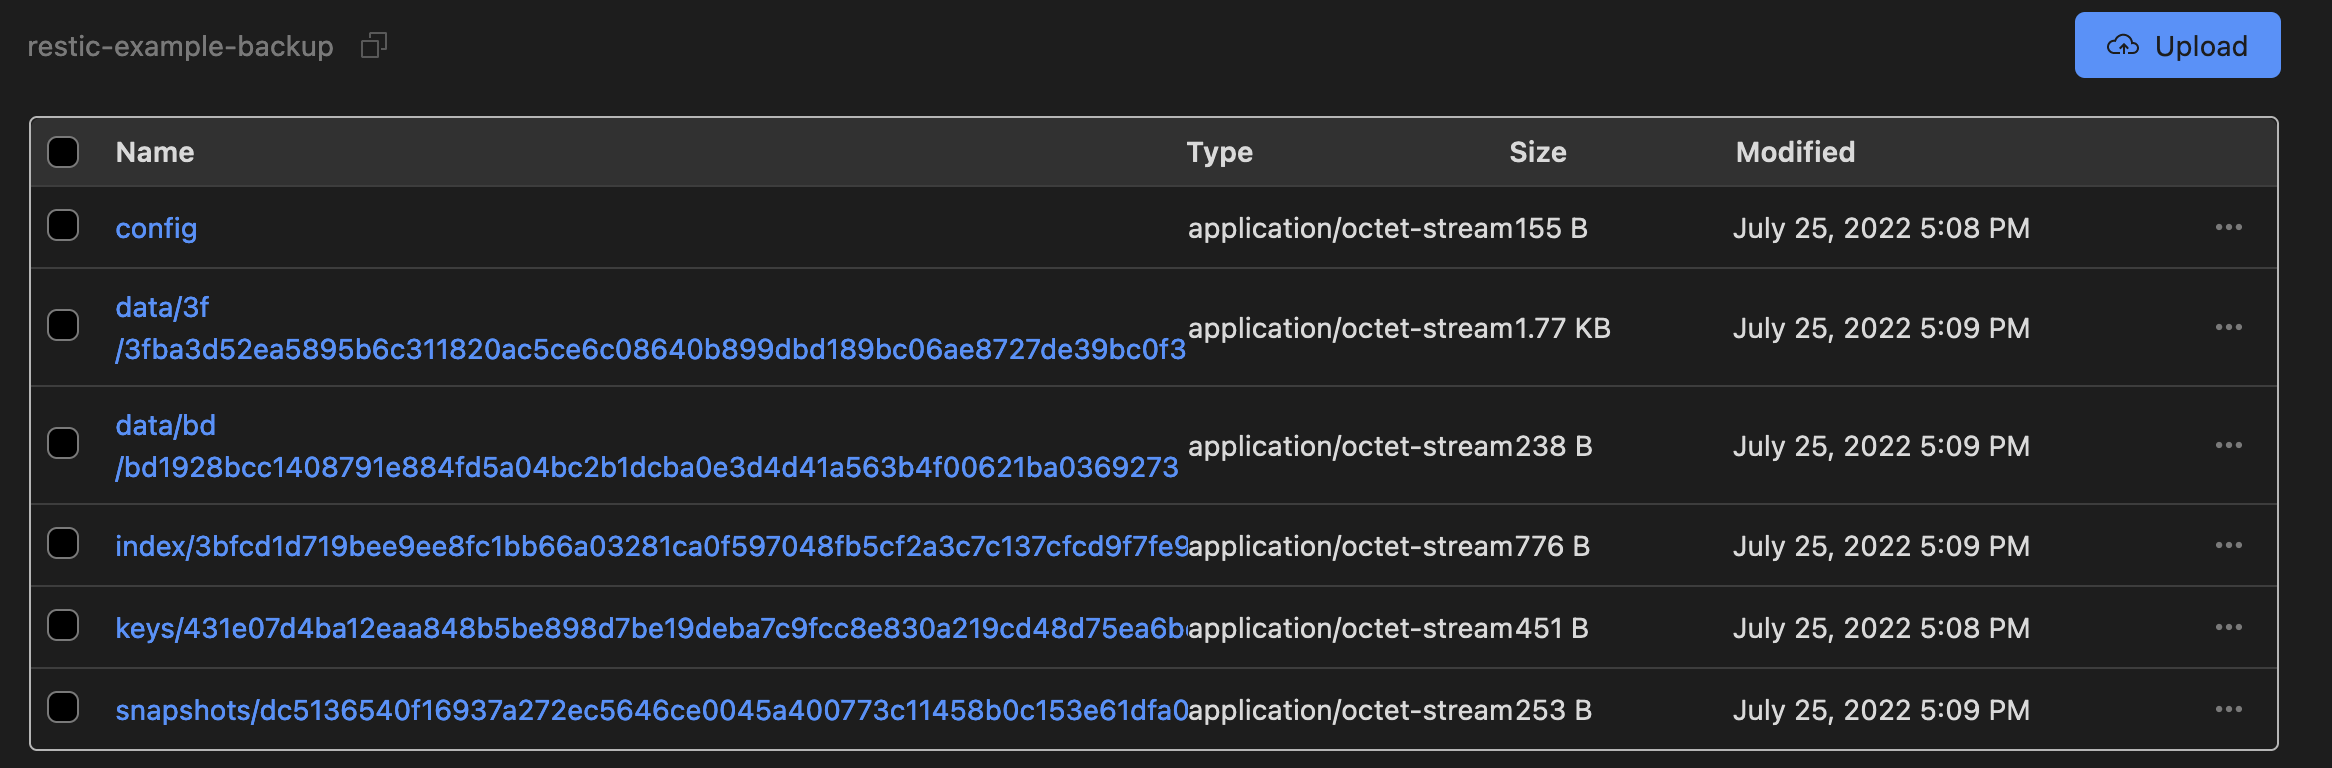
snapshot dc513654 saved
And we can see the encrypted data in Cloudflare R2 interface!
Let’s try to restore our newly created backup
$ restic restore latest --target /tmp/
repository 80d579ee opened successfully, password is correct
restoring <Snapshot dc513654 of [/home/example/example_folder] at 2022-07-25 17:09:13.981928417 +0200 CEST by example@host1> to /tmp/

$ tree /tmp/example_folder/
/tmp/example_folder/
├── collaboration
│   └── customer_list.txt
└── work.txt
The latest argument tells restic to pick the latest snapshot. We now have a working backup/restore either from disk or a remote location. Restic is extra nice because it also encrypts the data, so Cloudflare is not aware of the content of the backup.
Info:
Restic is also able to copy snapshot from one repository to another. We could have copied a snapshot from our local repository to the R2 repository instead of doing a restic backup again.
Automating it
Doing manual backup is fine, but automating them is better. Our goal is to have an automated nightly backup that will keep
- Daily backup for the last week
- Weekly backup for the last month
- Monthly backups for the last year
- Yearly backup afterward
Let’s first create our systemd service to run our backup:
[Unit]
Description=Restic backup
[Service]
Type=oneshot
User=root

# Load up environment values for restic to connect to repository
Environment="RESTIC_REPOSITORY=s3:https://<cloudflare_account_id>.r2.cloudflarestorage.com/homelab-backup/nuc1"
Environment="RESTIC_PASSWORD=<restic_repository_password>"
Environment="AWS_ACCESS_KEY_ID=<cloudflare_r2_access_key>"
Environment="AWS_SECRET_ACCESS_KEY=<cloudflare_r2_secret_key>"

# Check that the restic repo is in a valid state
ExecStartPre=/usr/local/bin/restic check
# Backup all the folders we want to backup
ExecStart=/usr/local/bin/restic backup --verbose /home/example/example_folder
ExecStart=/usr/local/bin/restic backup --verbose /etc
# Forget & prune the snapshots that match our policy
ExecStartPost=/usr/local/bin/restic forget --keep-within-daily 7d --keep-within-weekly 1m --keep-within-monthly 1y --keep-within-yearly 75y
ExecStartPost=/usr/local/bin/restic prune
/etc/systemd/system/restic-backup.service For more details about restic policies, read their docs.
Then we can create a systemd timer to schedule this job at regular interval /etc/systemd/system/restic-backup.timer.
[Unit]
Description=Restic backup

[Timer]
OnCalendar=*-*-* 03:00:00
RandomizedDelaySec=0

[Install]
WantedBy=timers.target
After creating these files, don’t forget to run the following command so that the backup timer is started & enabled.
$ systemctl daemon-reload && systemctl enable restic-backup.timer && systemctl start restic-backup.timer
If you want to test the backup job, you can run:
# Start the backup job
$ systemctl start restic-backup.service

# Check job status & logs
$ systemctl status restic-backup.service